Welcome to the fascinating world of antique car upholstery restoration! As an expert in the art of reviving vintage automotive interiors, I’m thrilled to guide you through the step-by-step process of changing the upholstery in your cherished antique car.
Antique cars hold a special place in our hearts, embodying a rich history and timeless elegance that captivates enthusiasts worldwide. Preserving their unique charm and authenticity requires careful attention to detail and a passion for craftsmanship. In this comprehensive guide, we will delve into the intricate steps involved in transforming your antique car’s interior into a masterpiece that honors its heritage while enhancing its beauty.
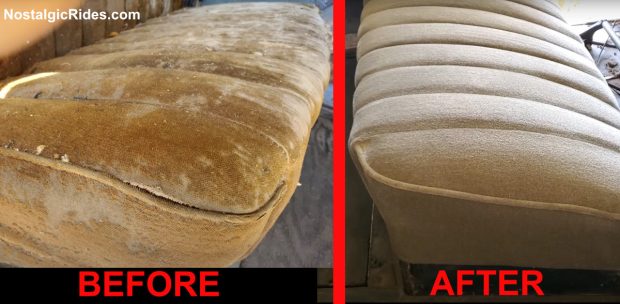
When you want to remodel your Antique car the first thing you should do is change the upholstery.

This car is from 1927, you read that right, from almost 100 years ago and it still has the original mohair upholstery. In this guide I will show you step by step how to change it for a brand new look but maintaining the appearance of the original.
Step by Step on How to Change Upholstery on an Antique Car
How to Change Upholstery on an Antique Car
Total Time: 5 hours and 30 minutes
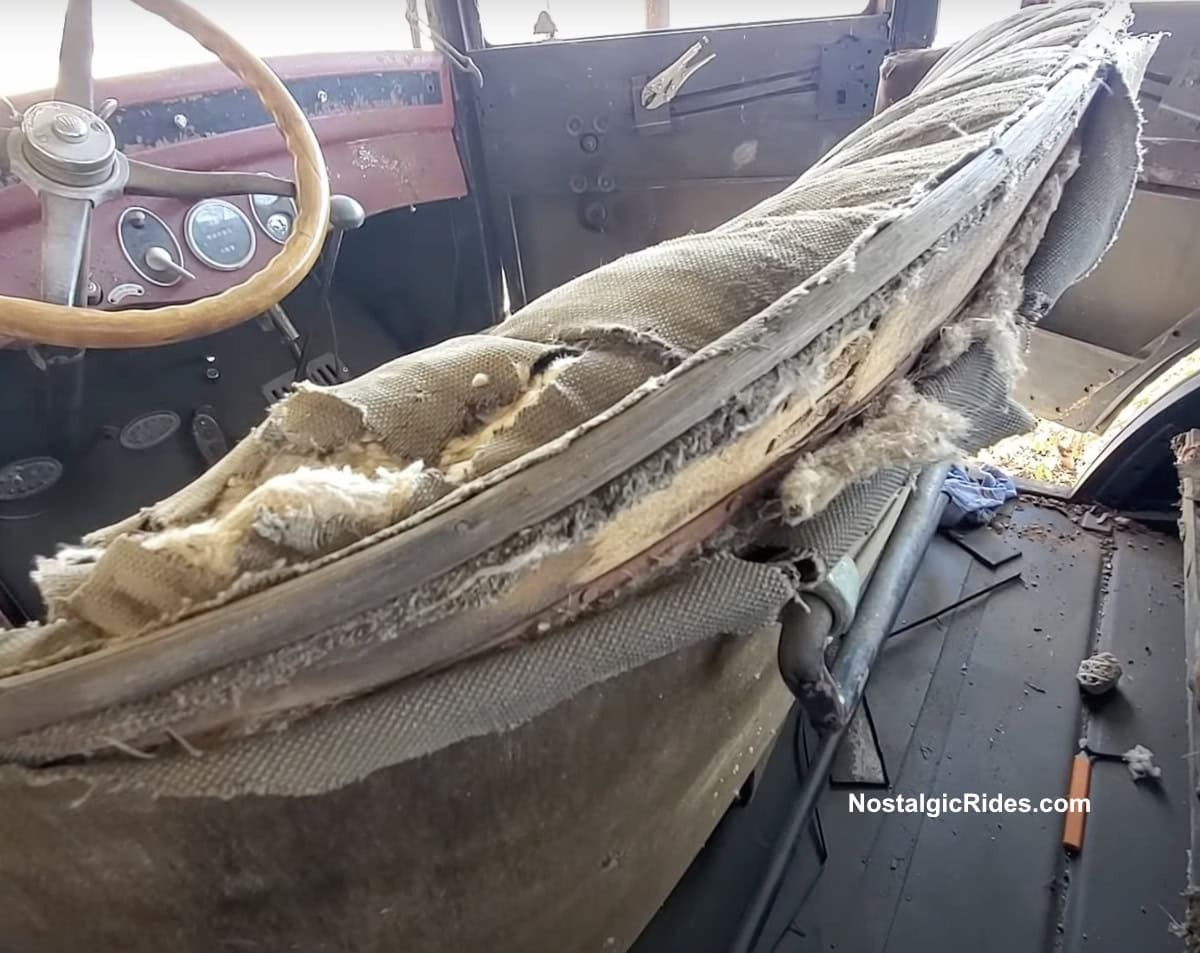
This is the Original Upholstery
This picture shows you how deteriorated the mohair upholstery is on this 1927 car.
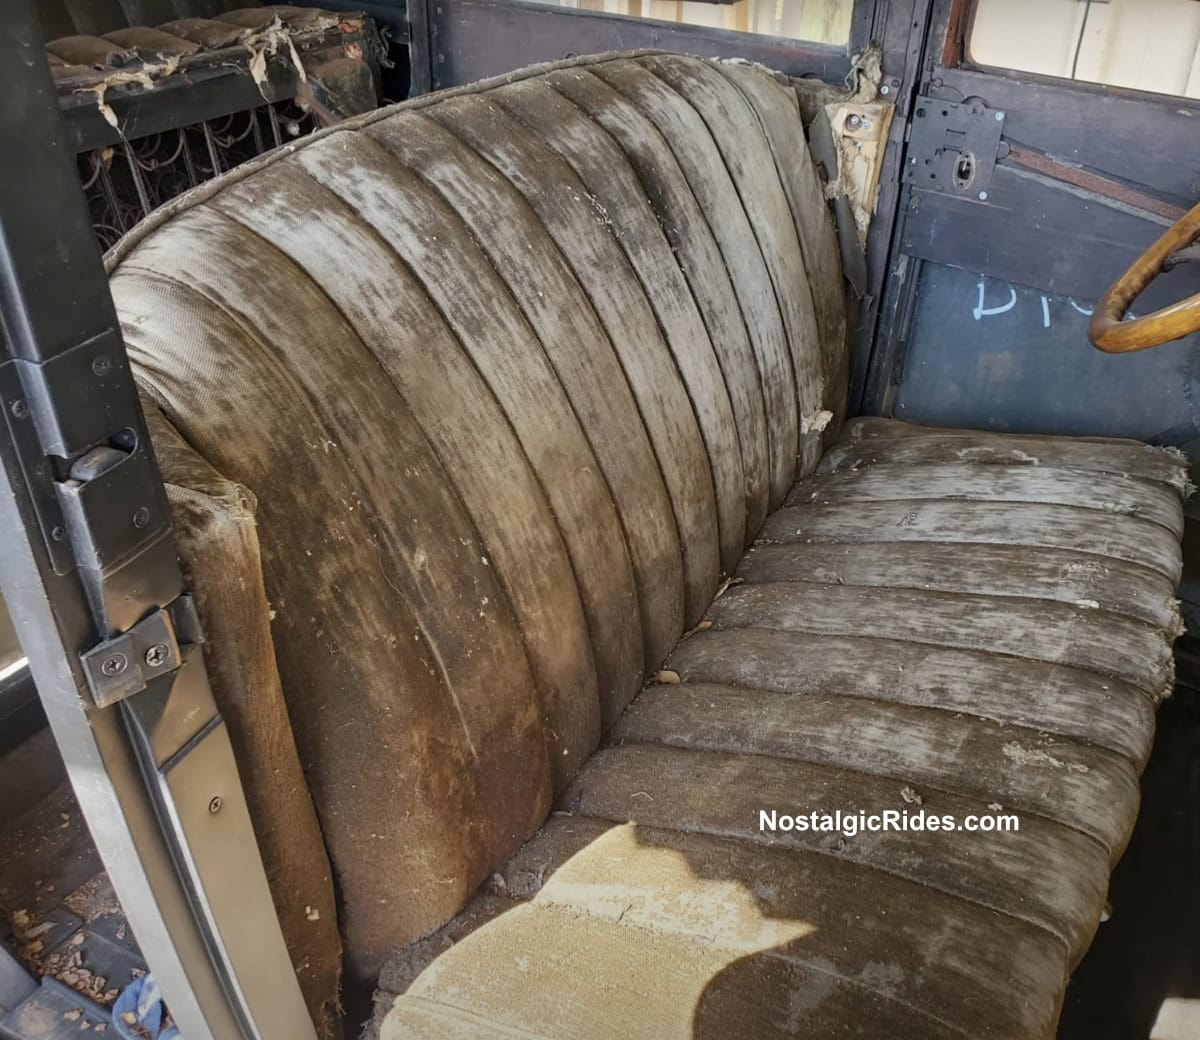
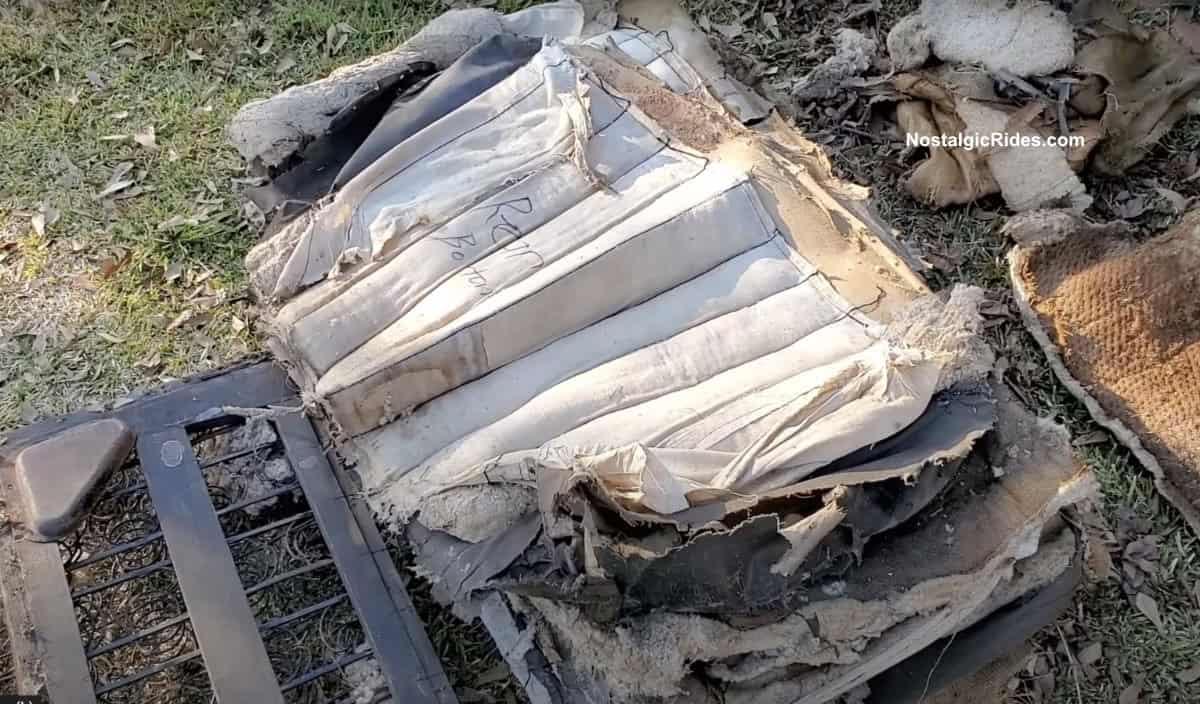
Back Seat Upholstery State
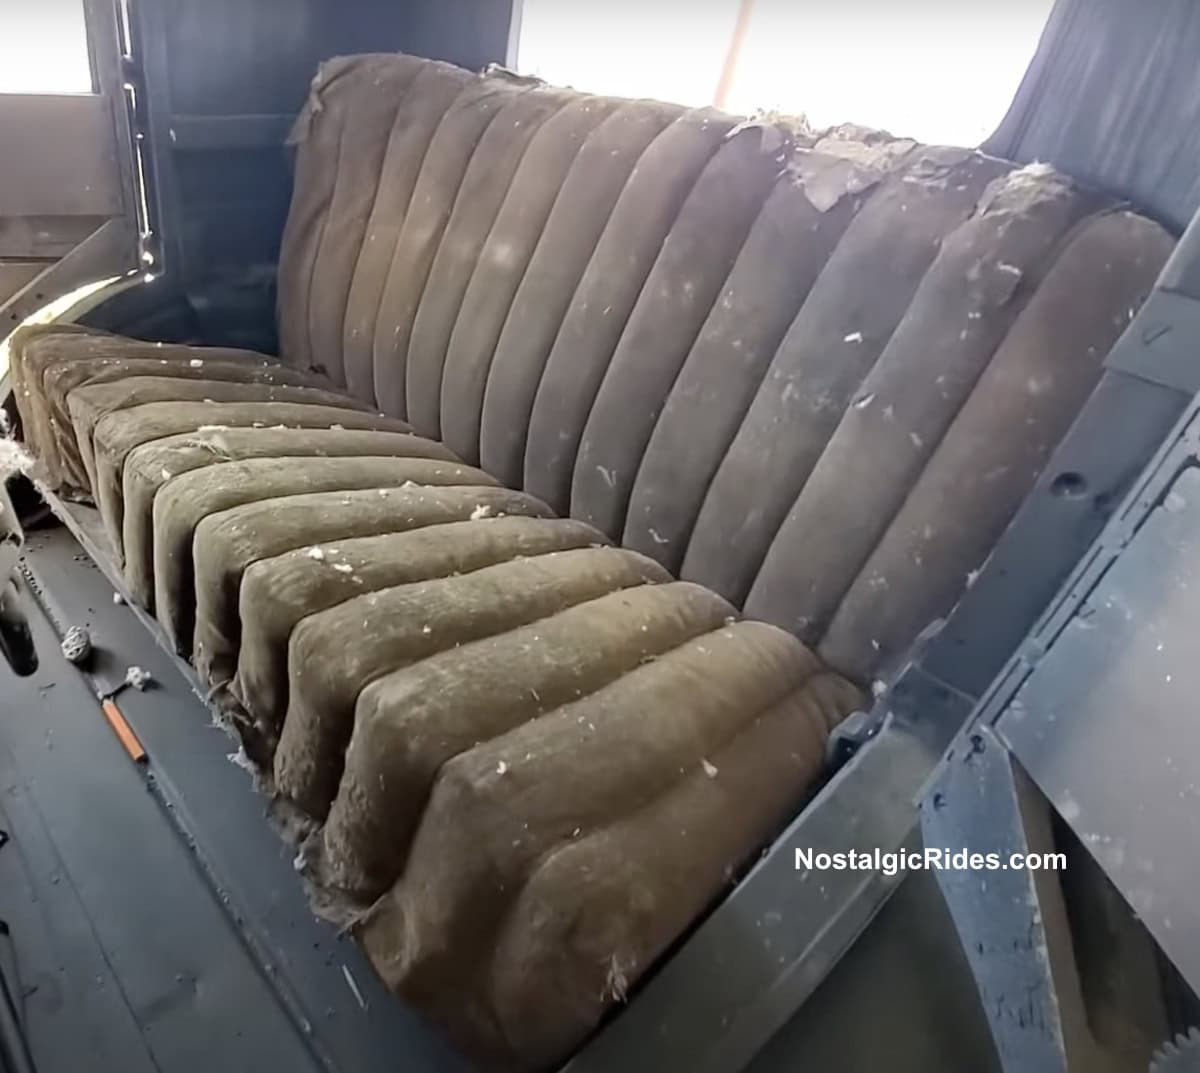
This is the current state of the upholstery in the back seat. It is pretty damaged, after being in use for almost 100 years.
Back of Front Seats
Here we can se the back part of the front seats. It is literally coming off, it is very beaten up.
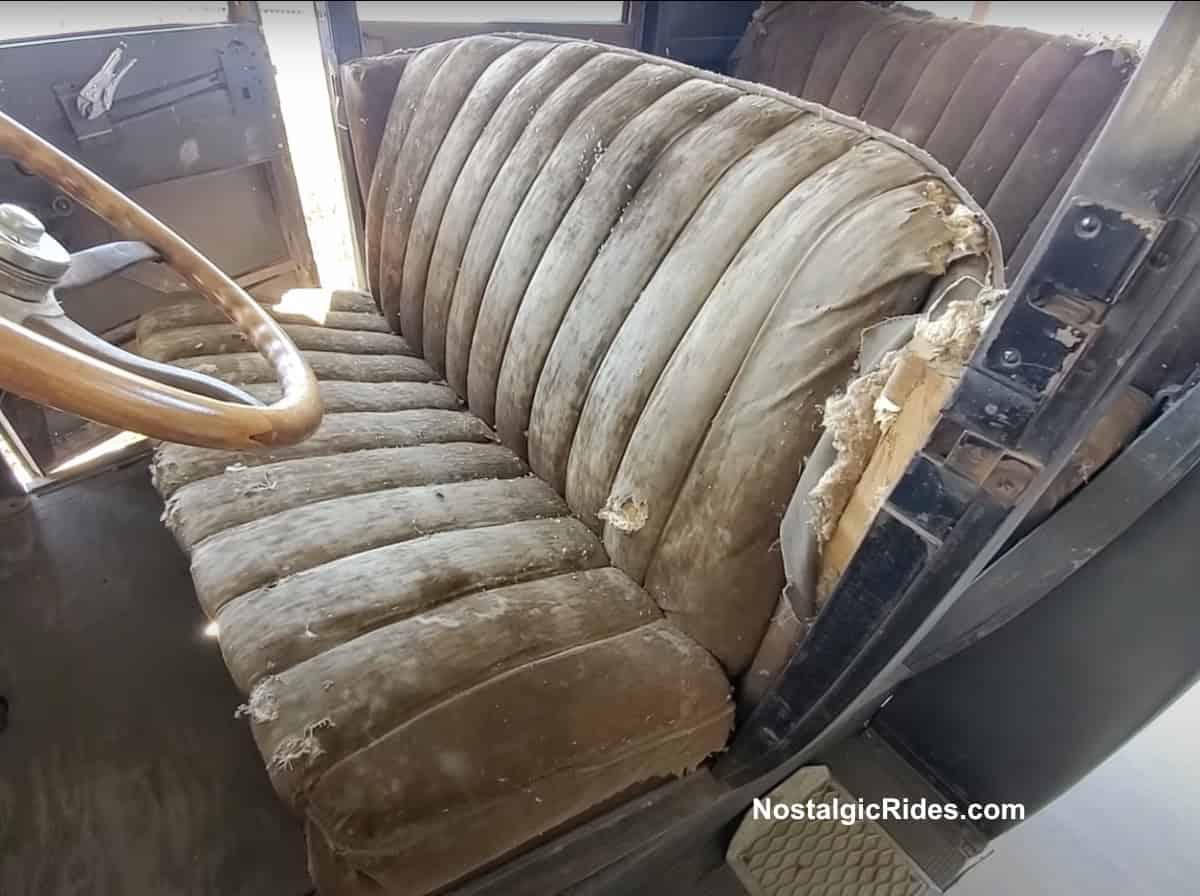
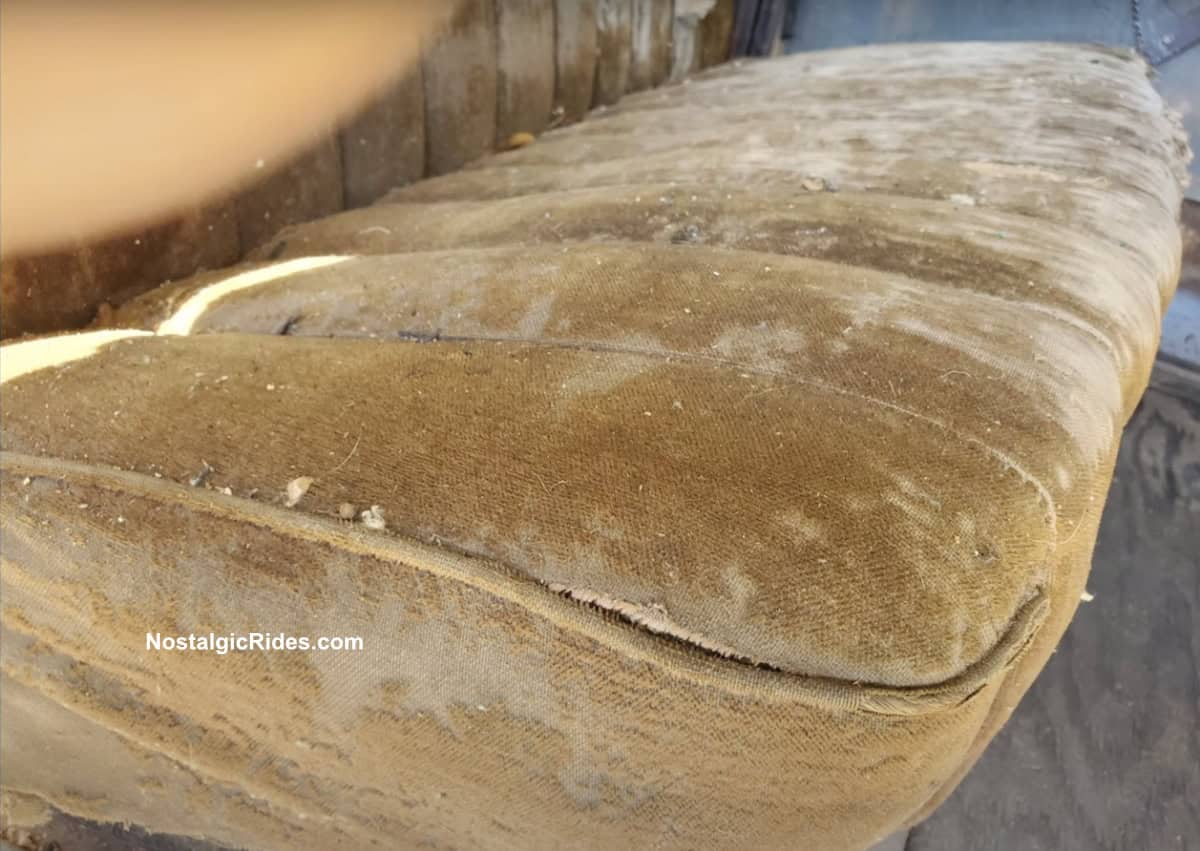
Front Seat
Check out how dirty the upholstery is. Check the pattern of the seats. The idea is to make the same pattern with the same size seams.
Take Pictures of Current State
You should take as many pictures as you can of the way the car currently is so when you are putting it back together you have a reference.
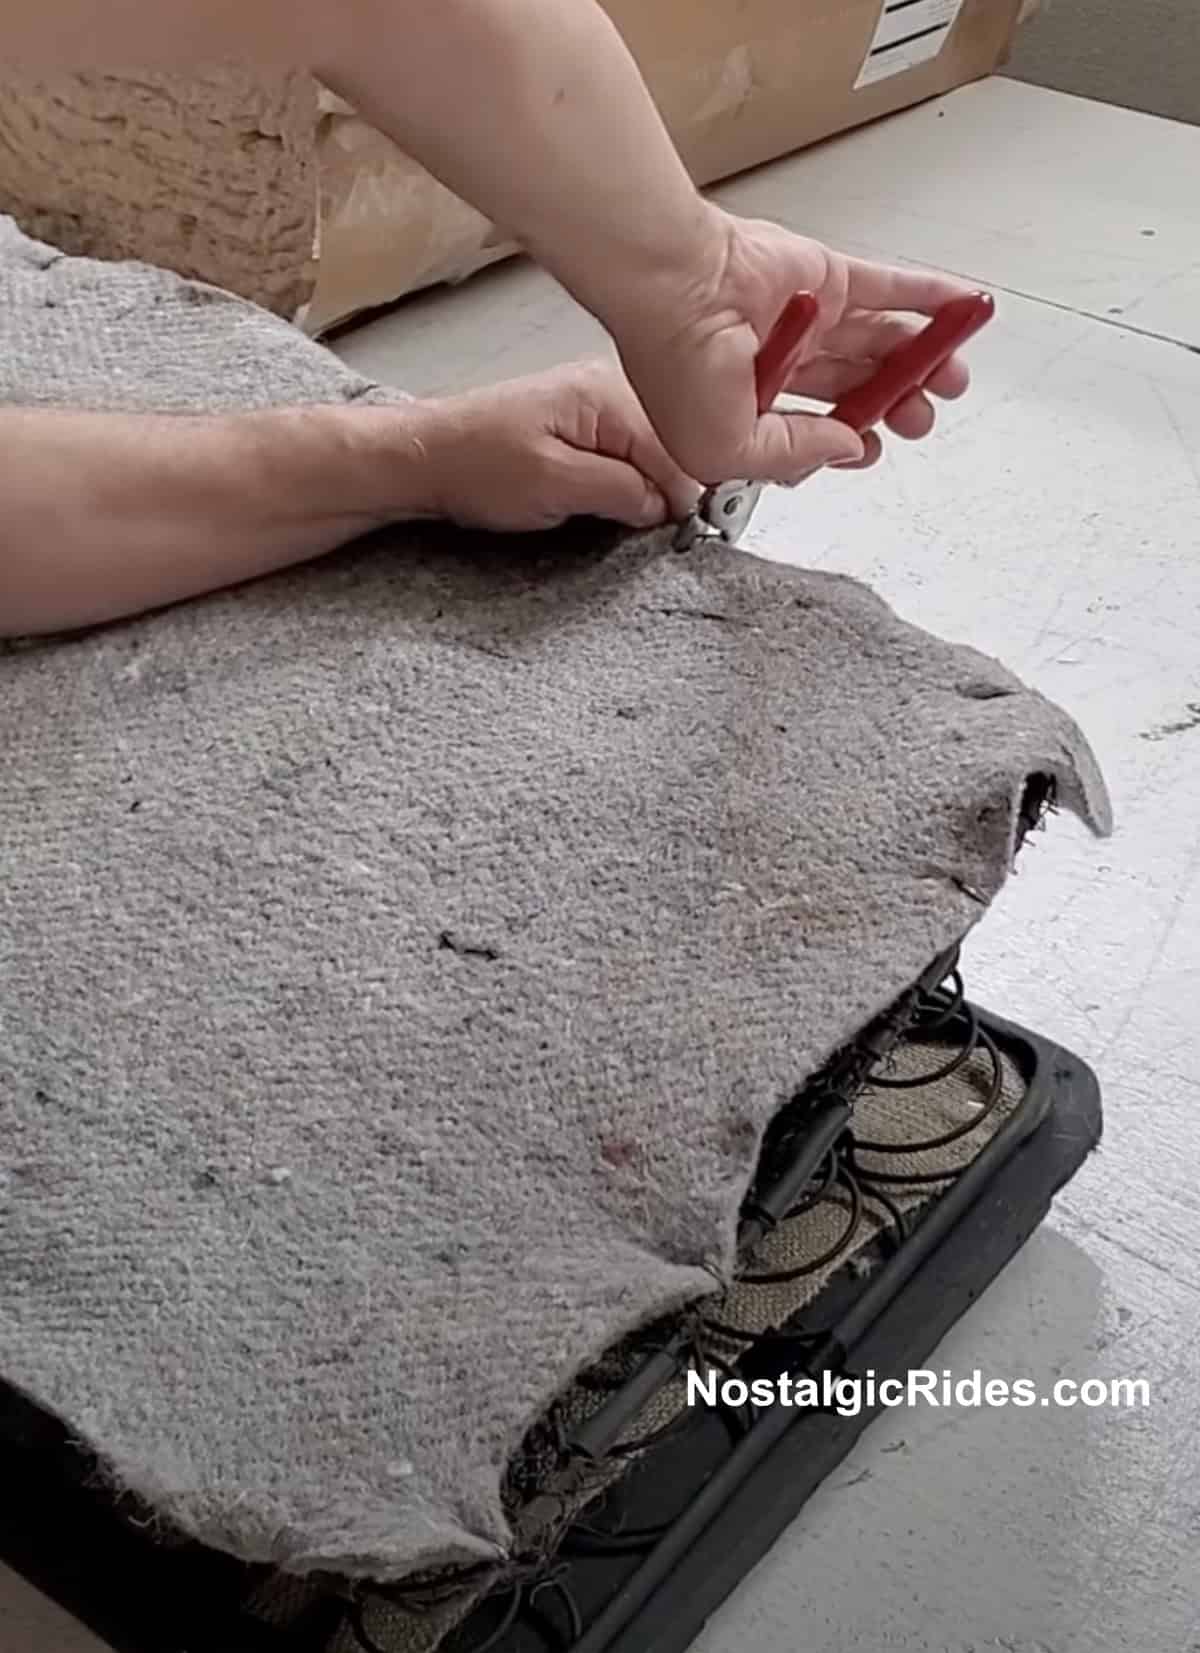
Start Taking Everything Apart
Start removing everything from the seats.
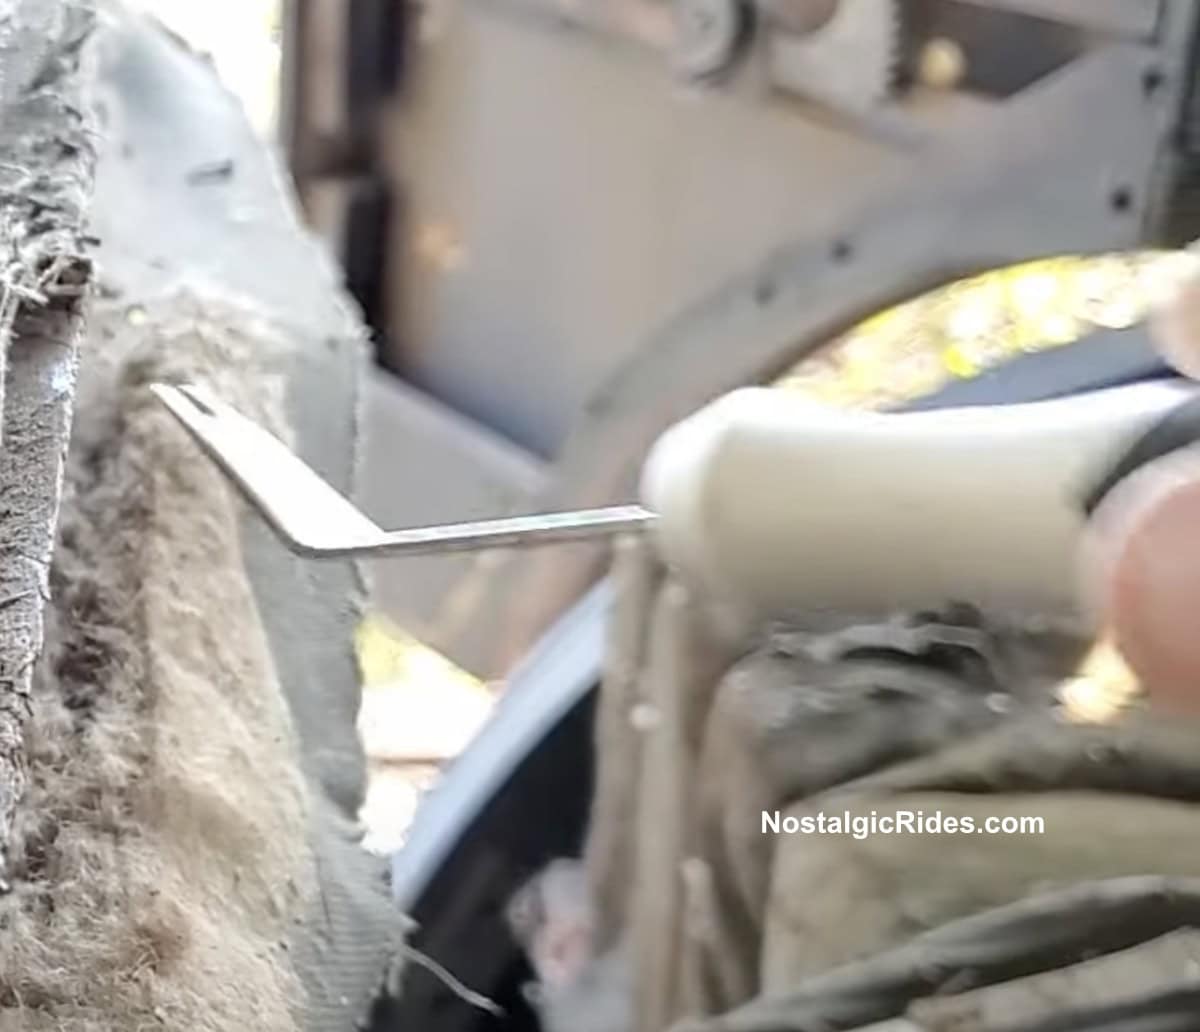
Remove Nails and/or Tacks
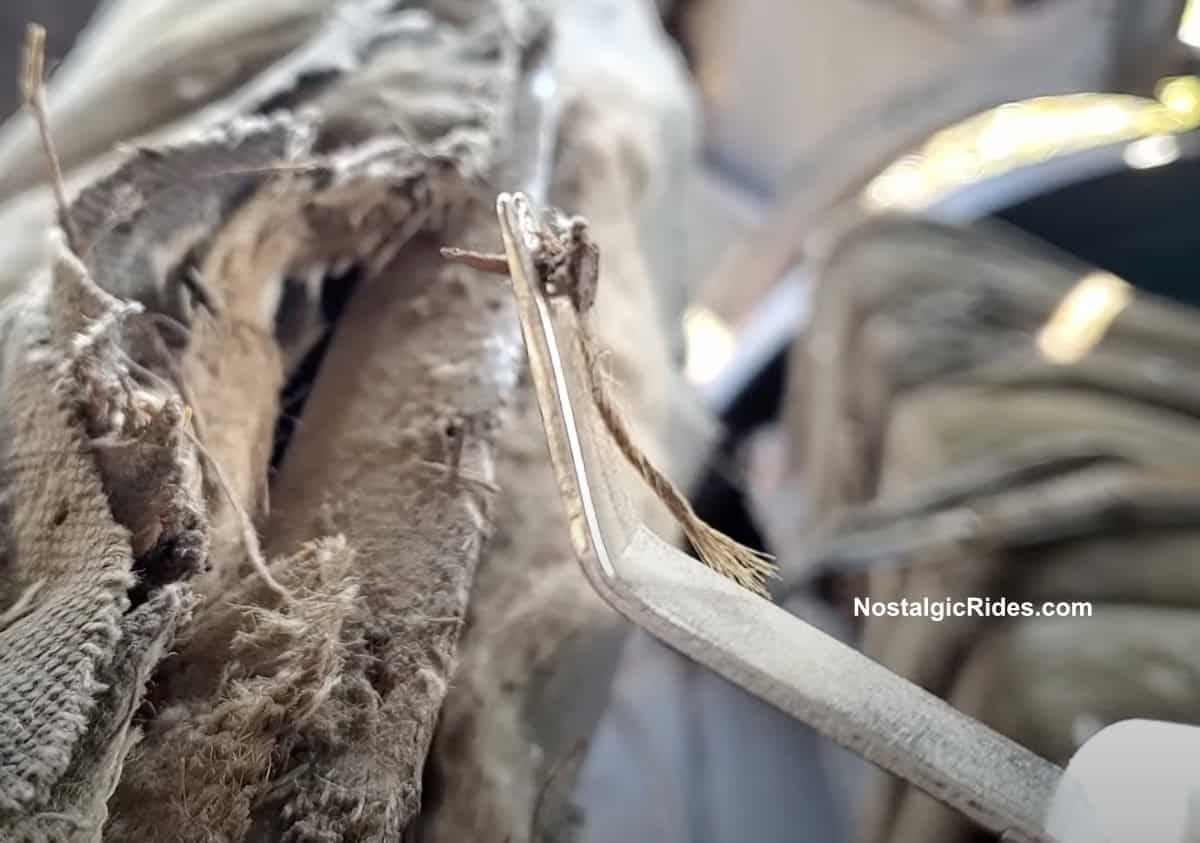
If there are any nail and/or tacks just remove them so you can take everything apart.
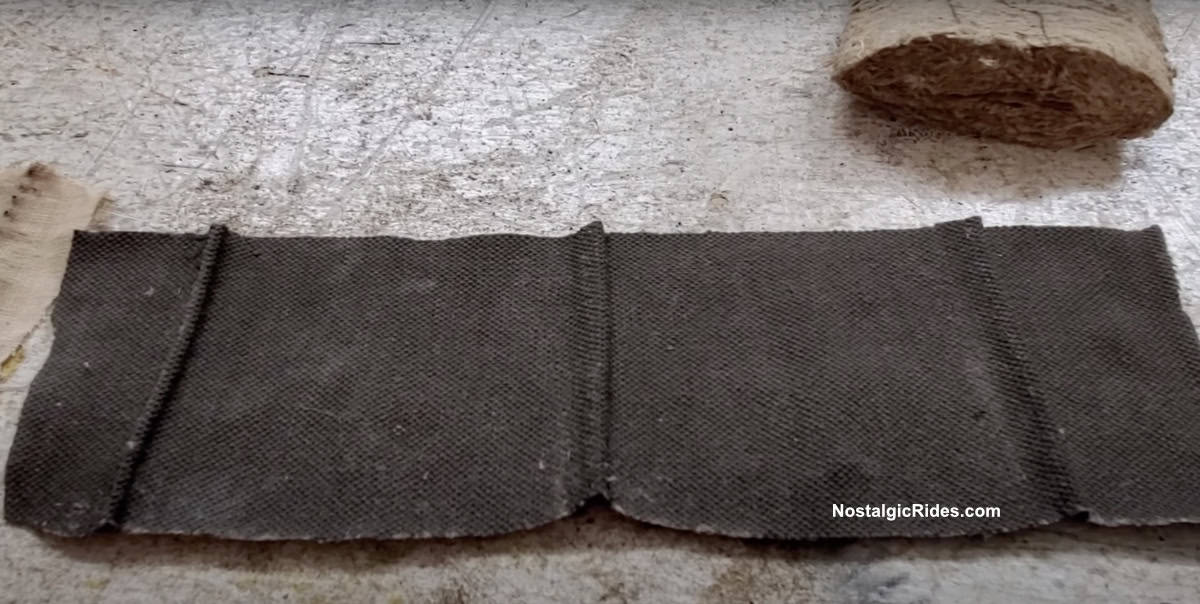
Spread The removed Upholstery
Once you have removed the whole upholstery from the seats, spread it on a flat surface or on the ground.
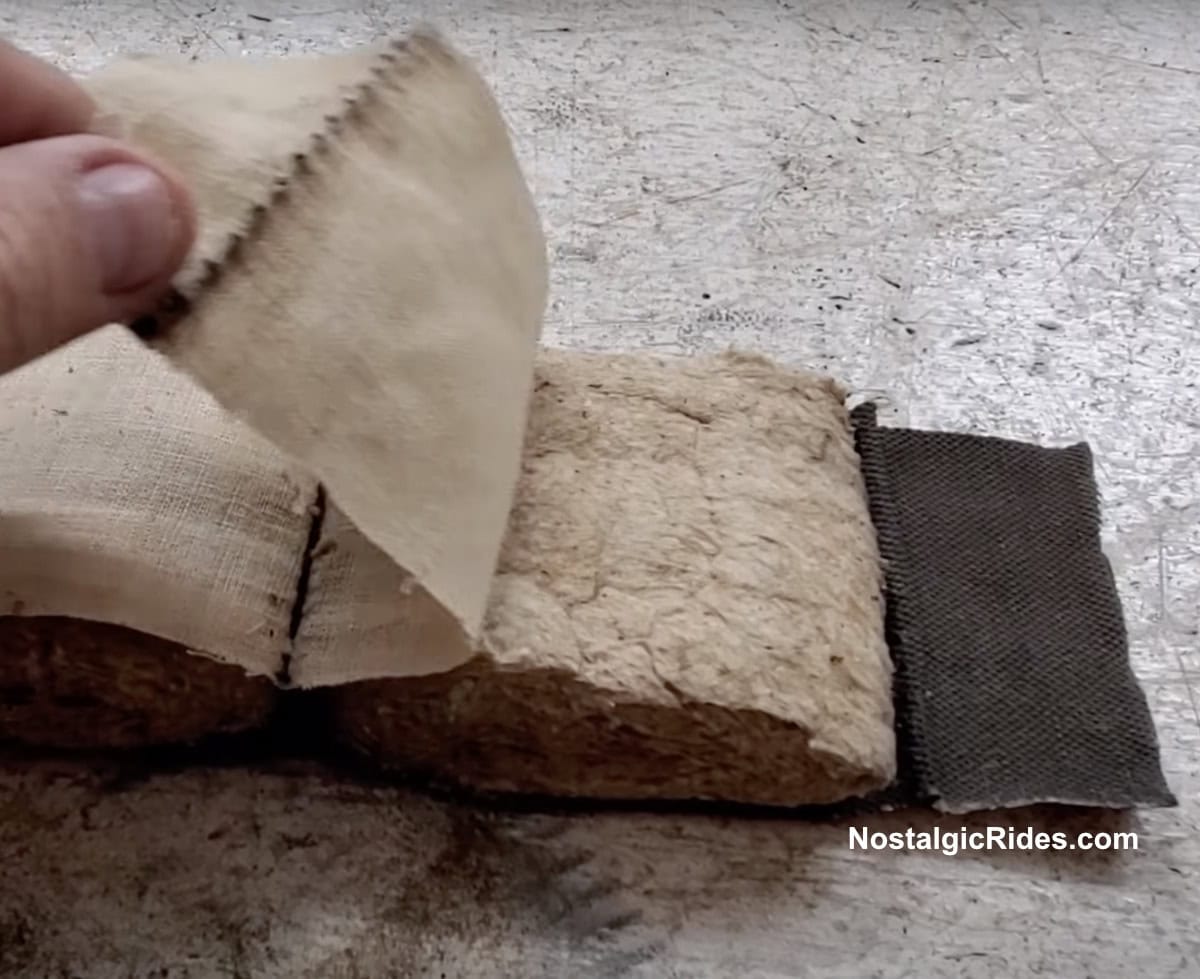
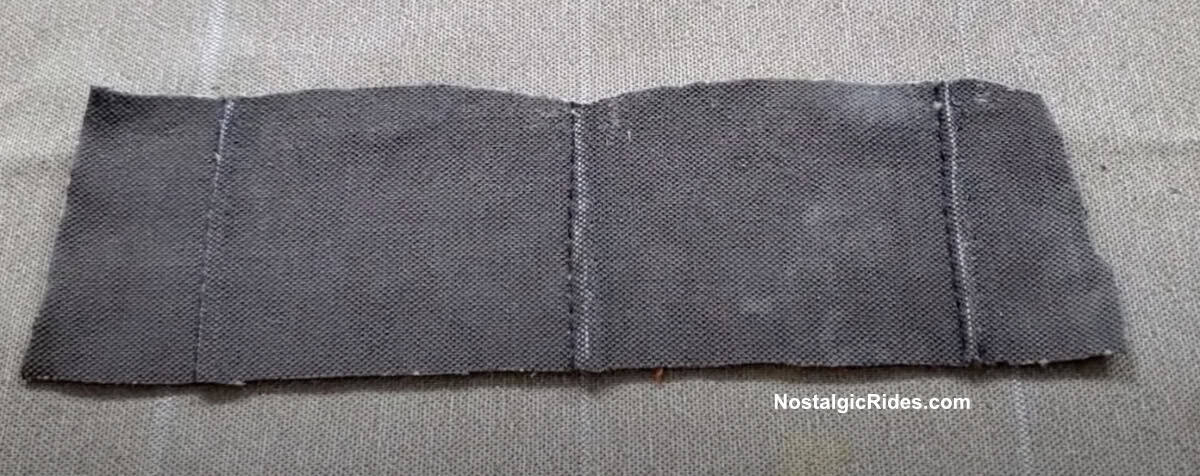
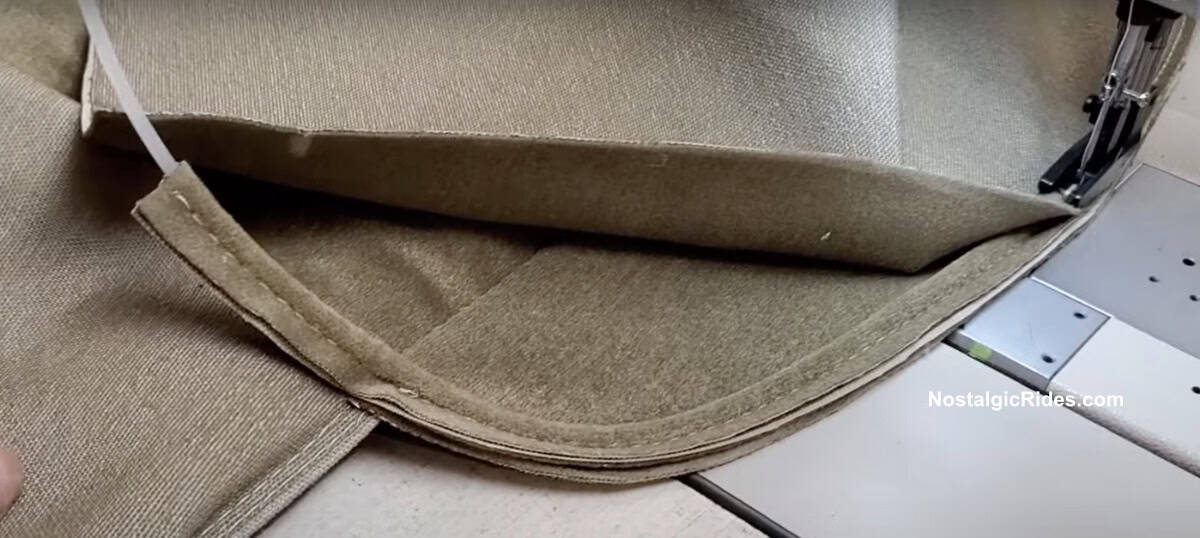
Cut a samll part
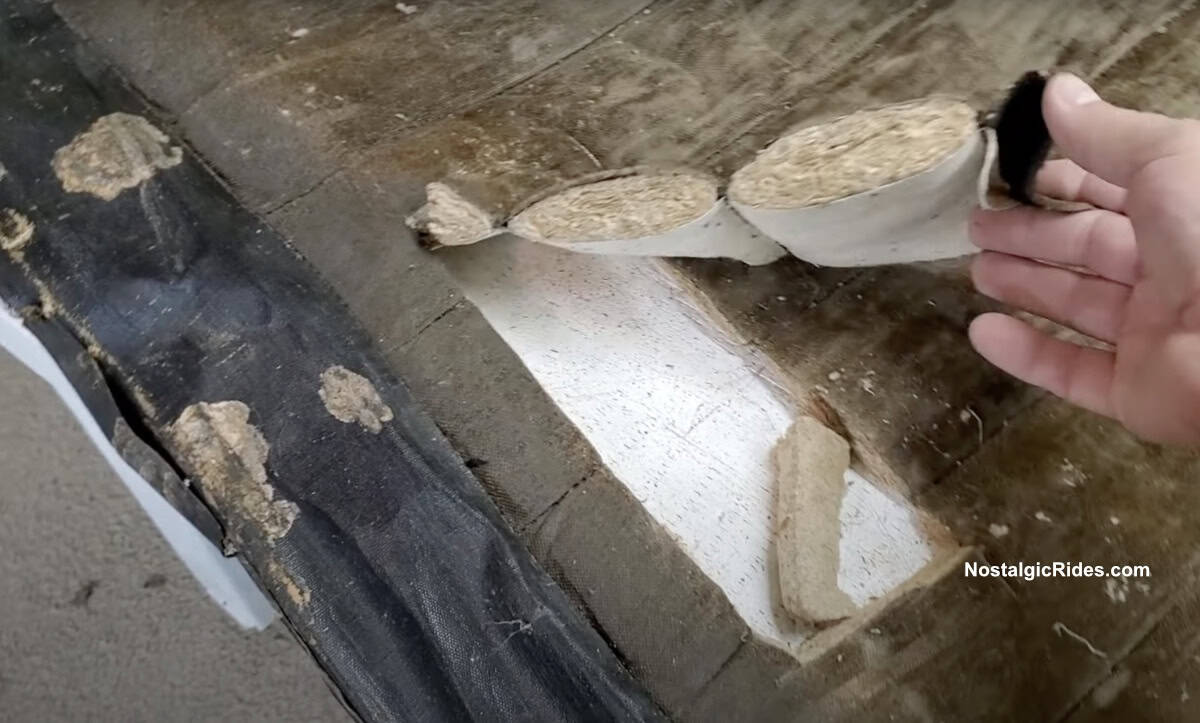
Cut a small part from the upholstery as shown in the picture.
Remove the part you have just Cut
Place the part you have just removed and place it in a flat surface.
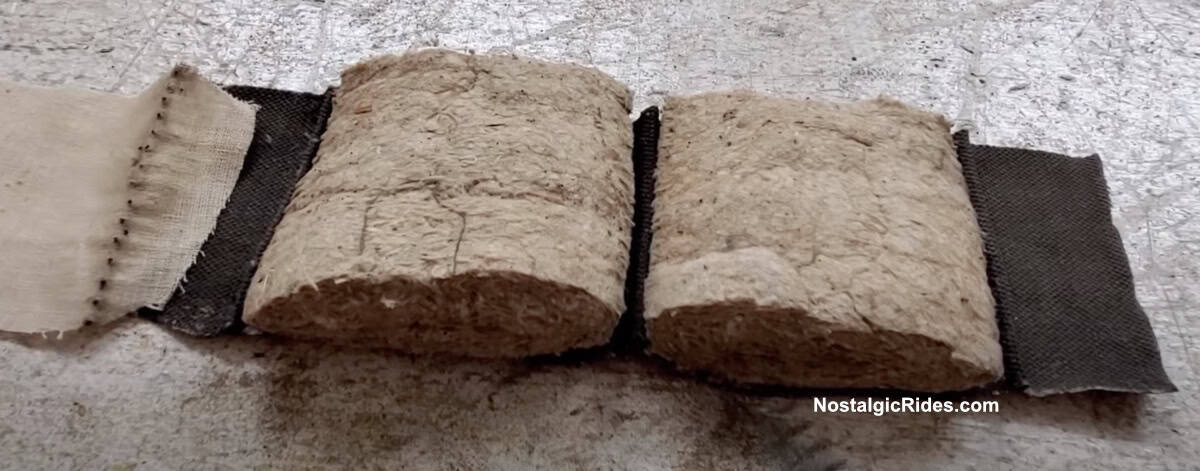
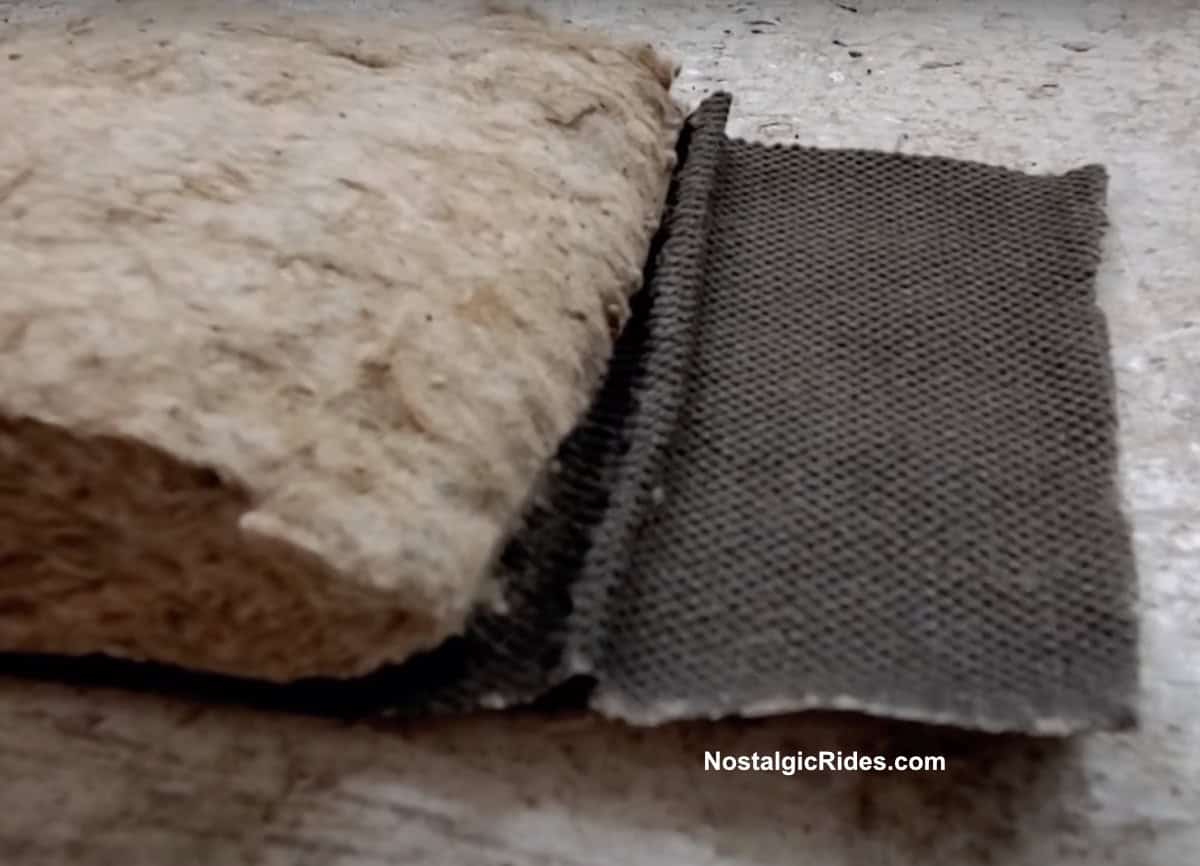
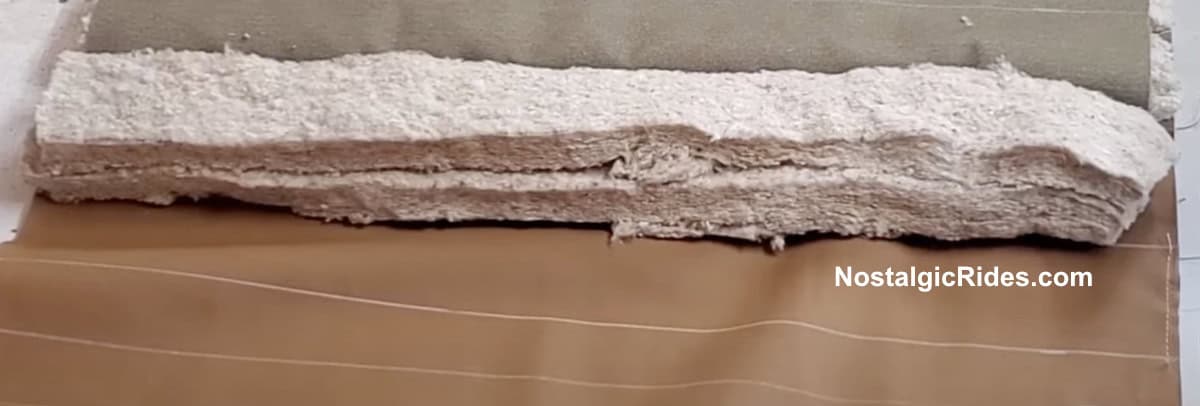
Remove the layer
Remove on of the layers as shown in the picture.
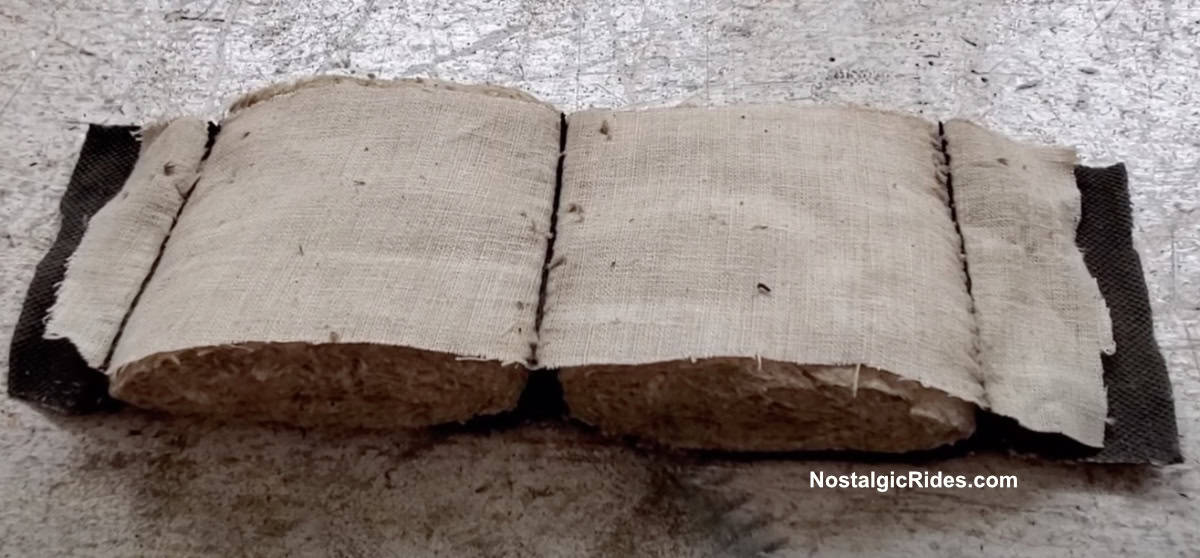
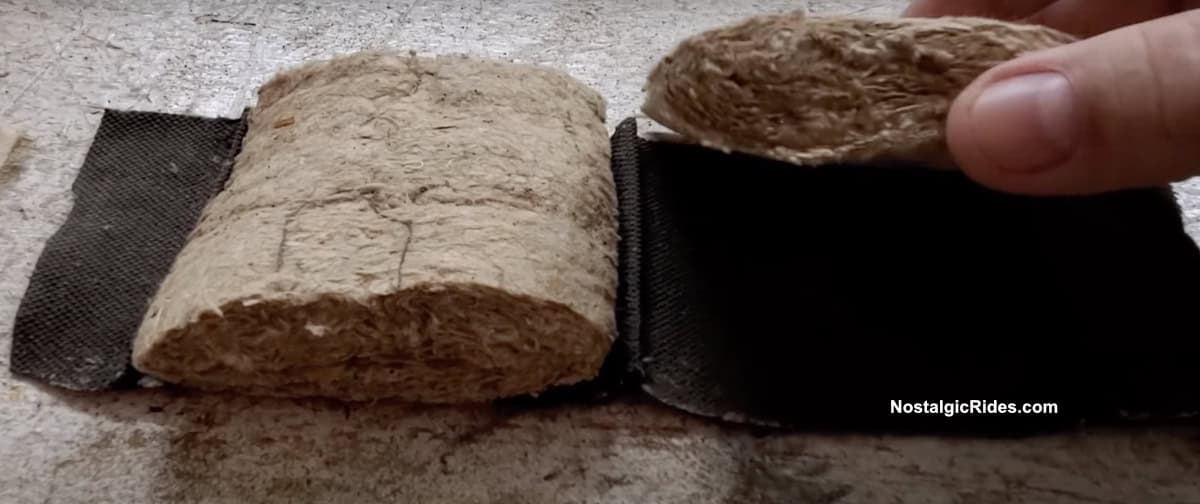
See how it is on the inside
Now you can see what is in the inside.
See how it was sewn together
Check out how it was sewn together.
Remove the Cotton
Now you remove the cotton. You will have to duplicate that cotton so use it as an example and for measurements.
Top Fabric
We are left with the top fabric with the folds. Spread it out to remove the folds, this will help for taking measurments.
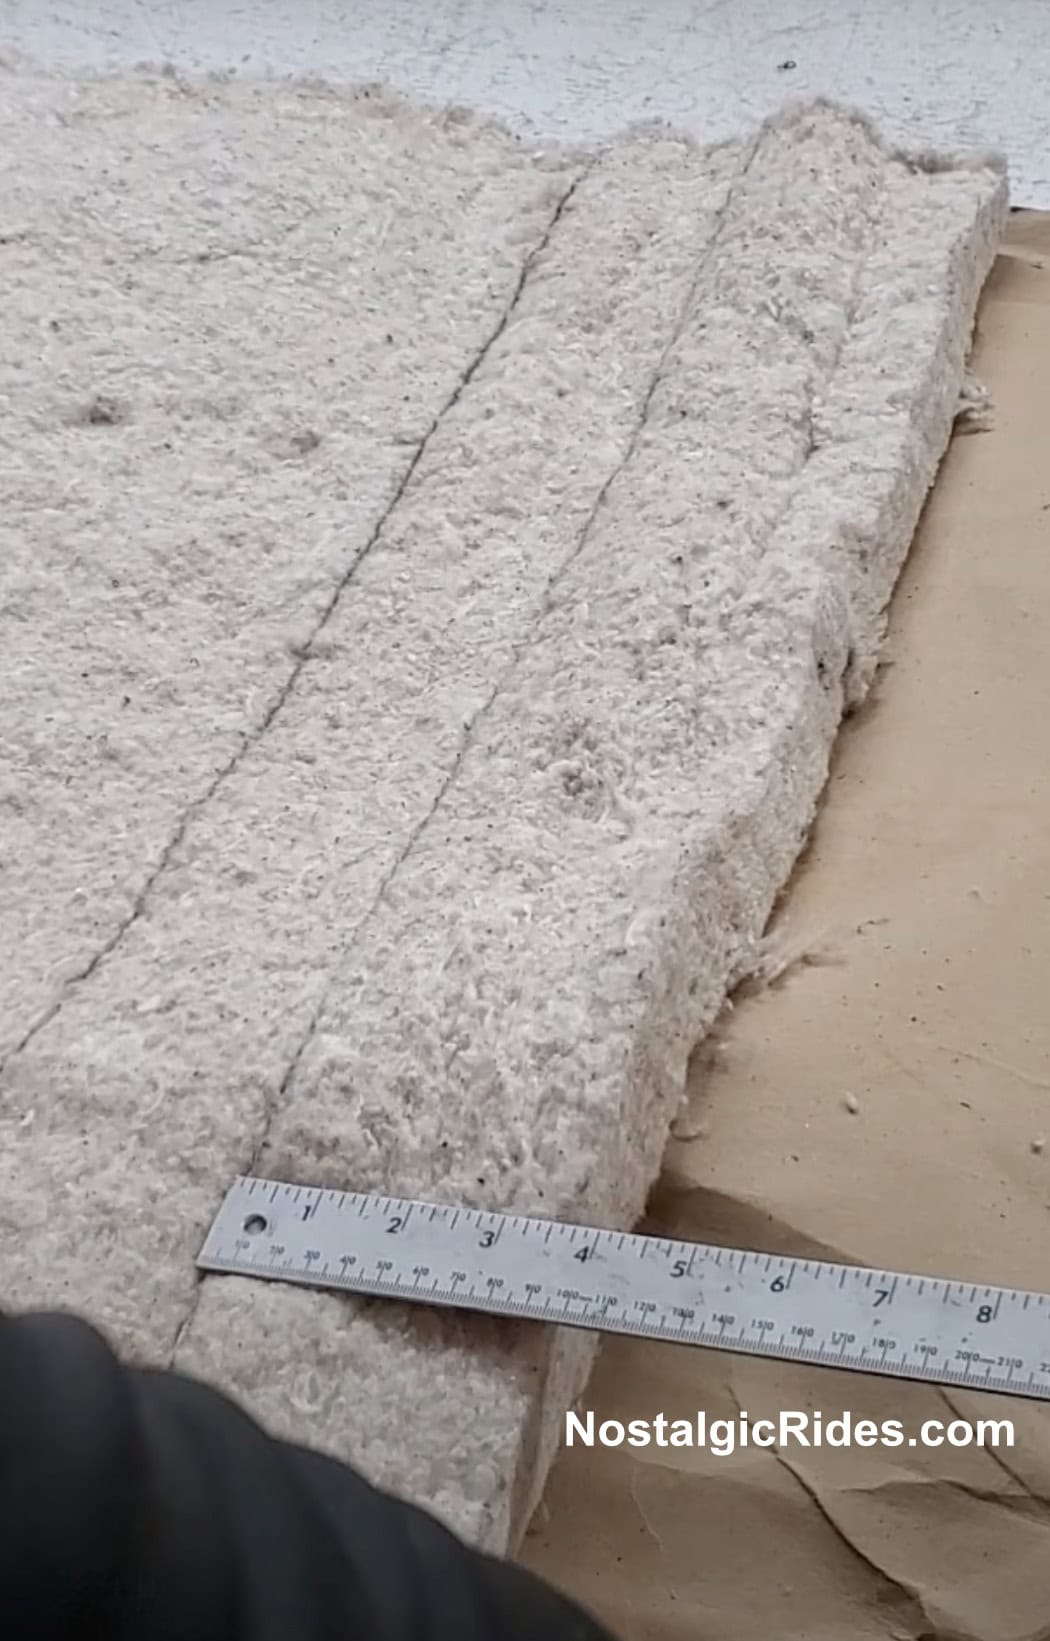
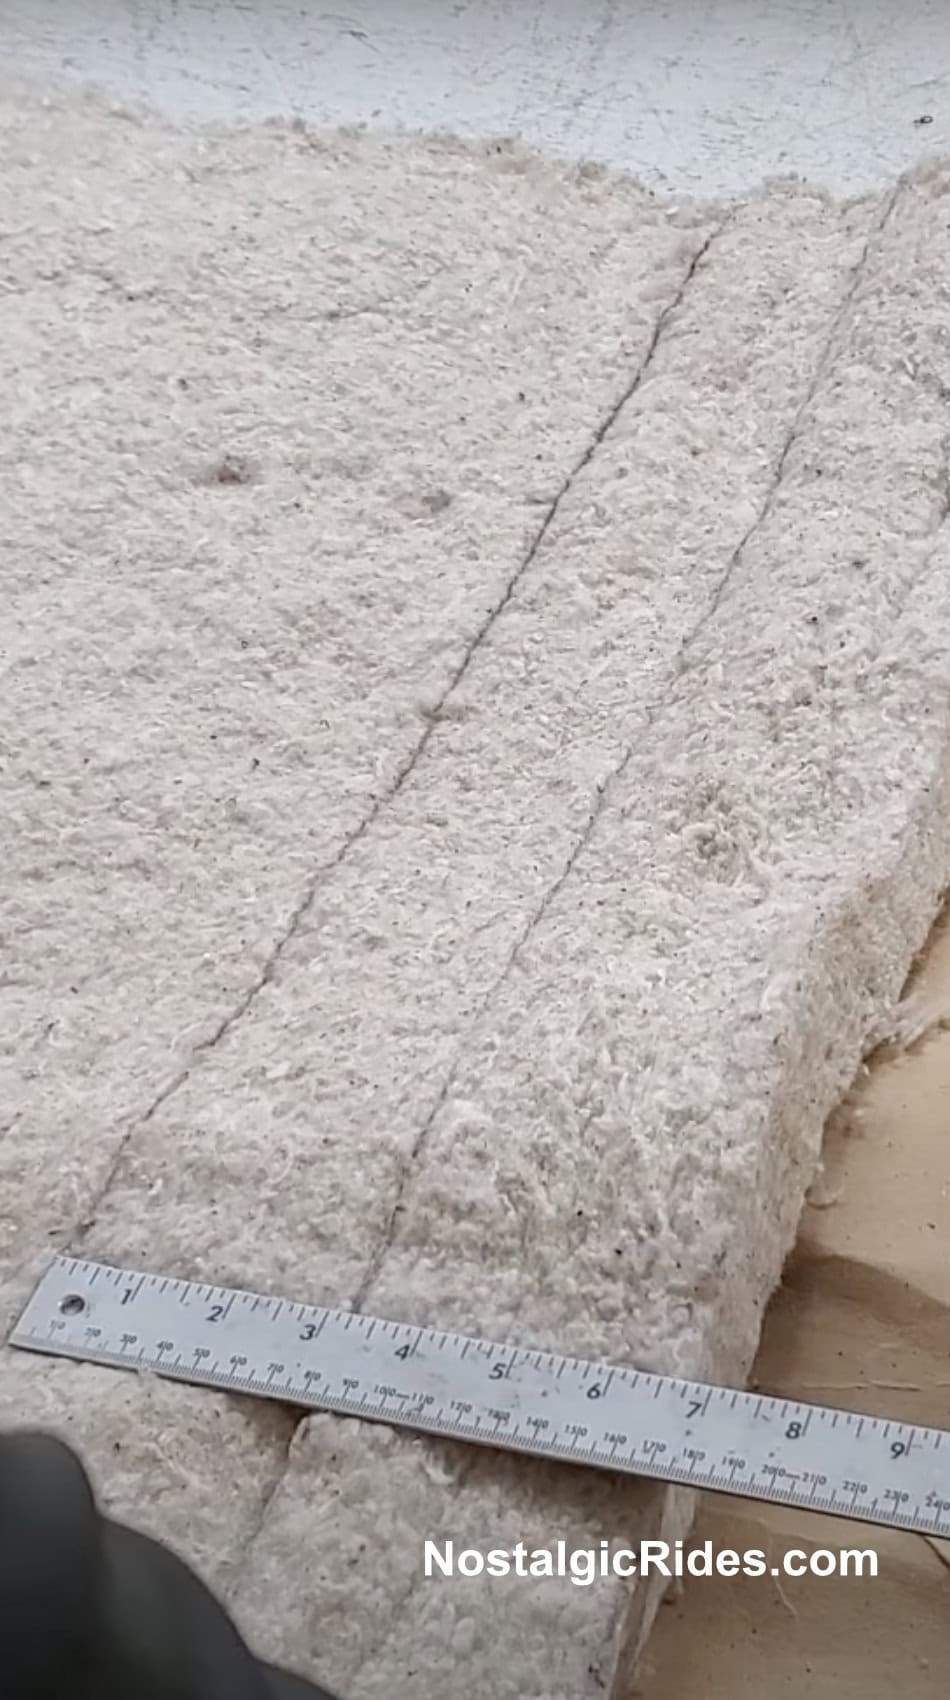
Measure fabric
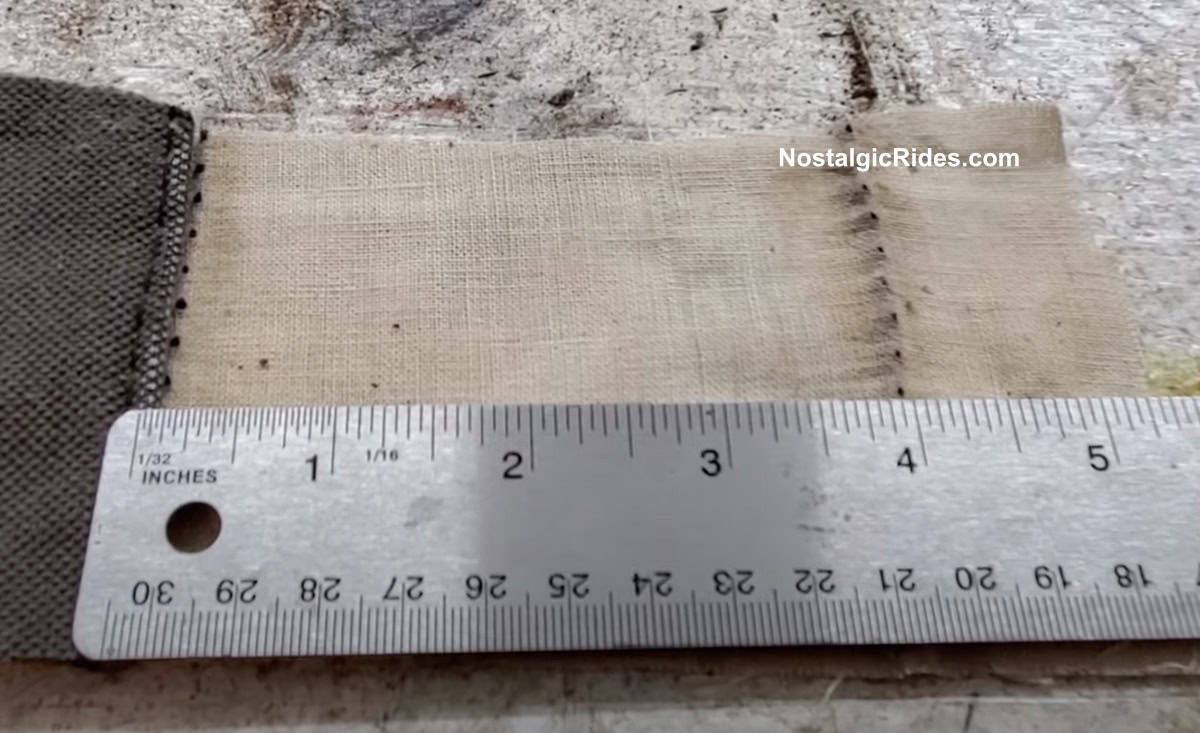
We first measure the bottom fabric and as you can see from the pciture it is 4 inches between pleats.
Measur Top fabric
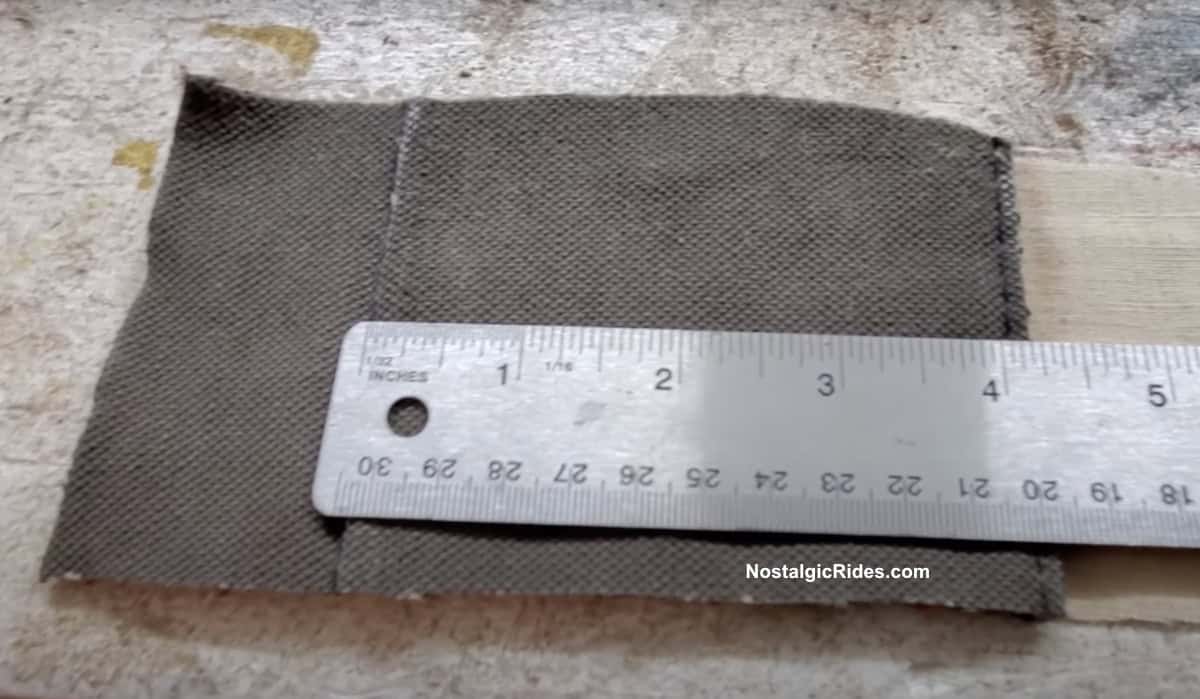
Measure the top fabric. You can see our top fabric measures 4-1/4 inches between pleats. As I want to make a bigger fold on the top fabric I will use 4-1/2 inches for my pleats of the top fabric.
Mark the new Panels
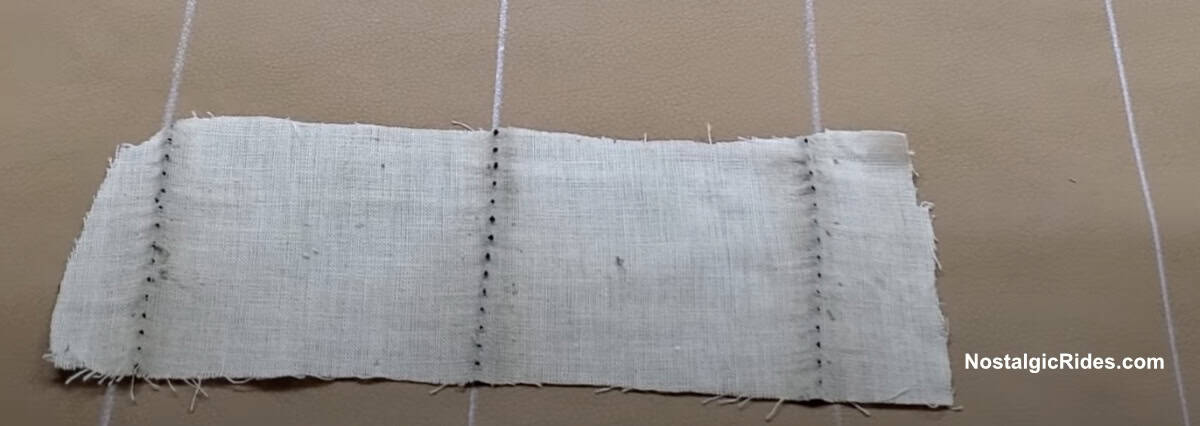
Mark the back side of the panels you will use with the measruments you took in the previous steps. In the picture you can see how I marked the bottom fabric with 4 inches lines.
Mark the Top fabric Panel
Mark the top fabric with the measurment you got. As I said I will be using 4-1/2 inches between pleats on my top panel. You can see in the picture my marked top fabric panel.
Cotton to Fill Pockets
I am going to use two layers to fill the pockets so they are nice and fluffy. The bottom layer of cotton will measure 3-1/2 inches in width, check picture.
Top Cotton Layer
The top cotton layer will measure 3 inches wide, check picture.
Scissors to cut Cotton
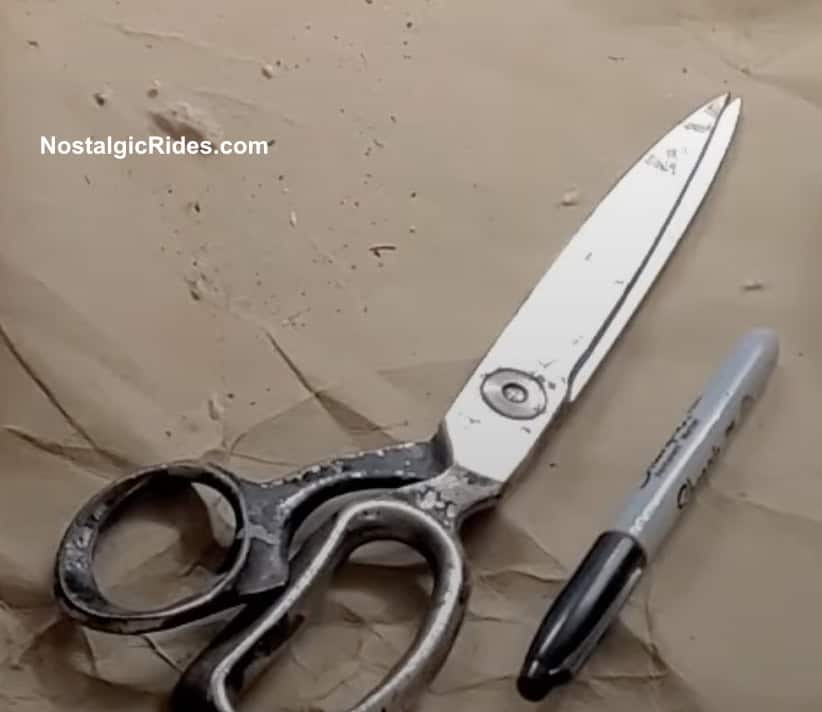
You can use a sharpie to mark the lines to cut the cotton. To cut you can use scissors like the ones in the picture.
Two layers of Cotton
In the picture you can see the 2 layers of cotton I will use to fill the pockets.
Put it All together
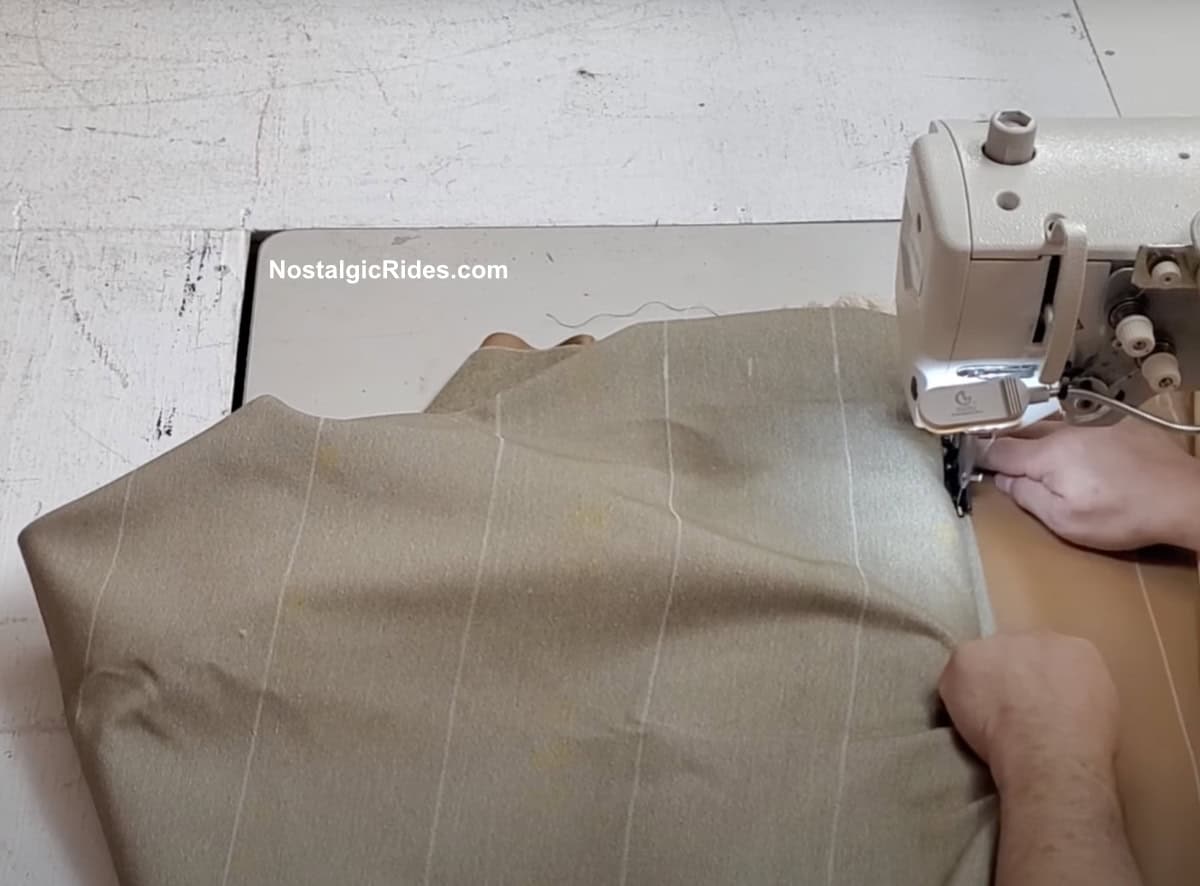
Now place the 2 layers of cotton between the bottom and top fabric and start sewing using the lines you marked.
1 by 1
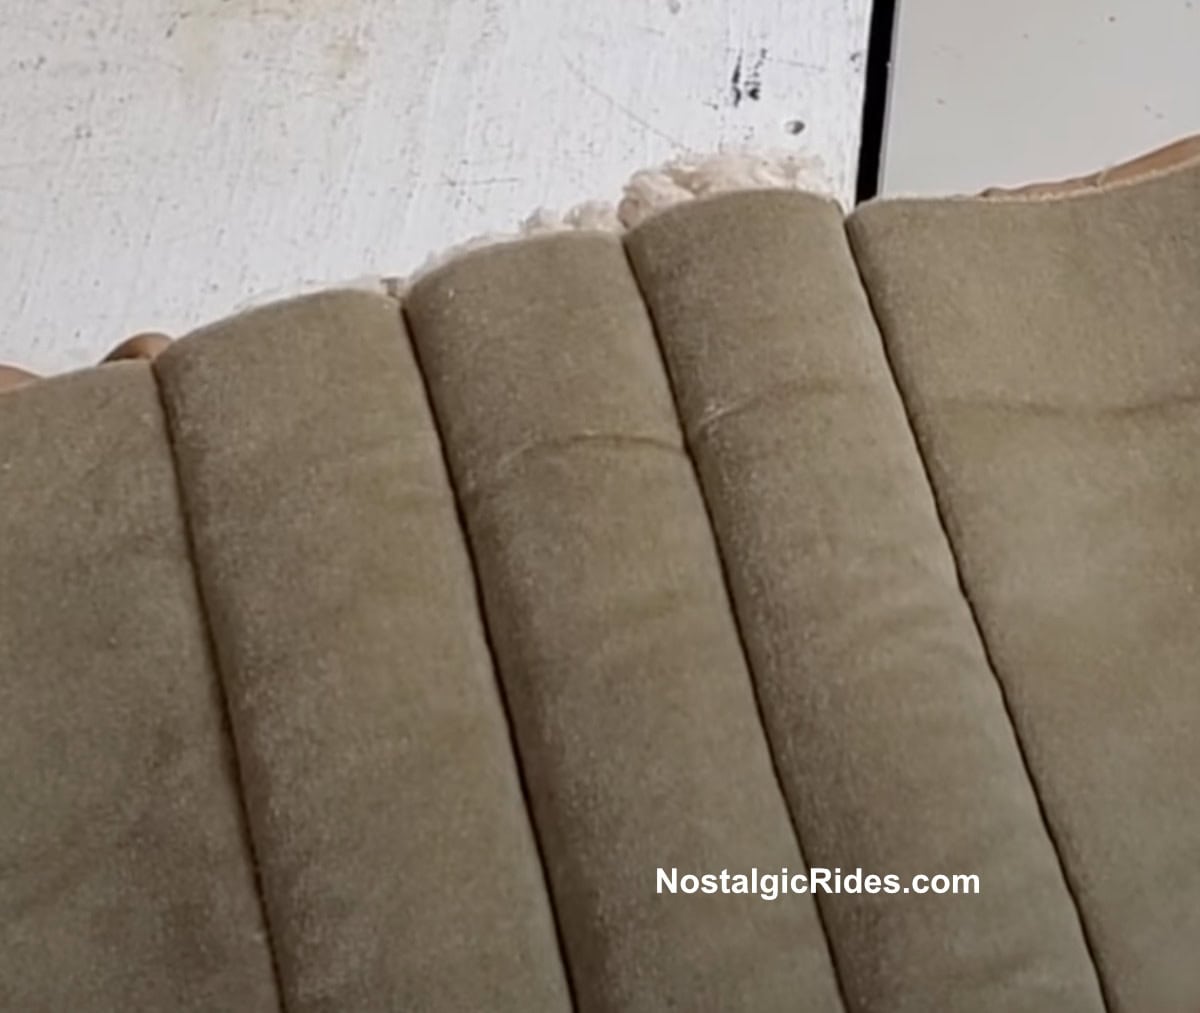
Here you can see how it looks from the top fabric. I have completed half of the work in the picture.
Complete all the pockets with cotton
Continue sewing each pleat until you finish the whole piece.
Add Zipper
Add the zipper to the end so you can close the upholstery when placing it on the base.
Prepare the Spring Base
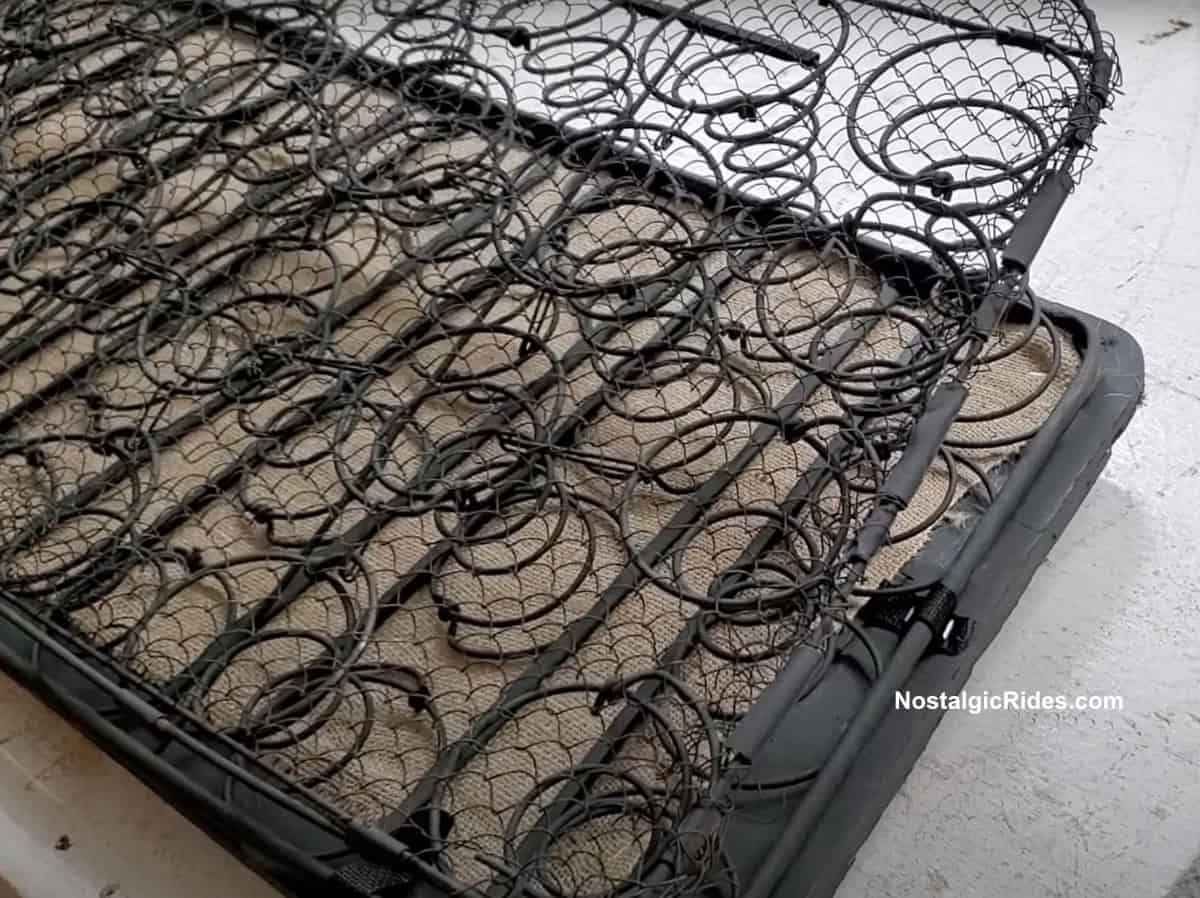
Now it’s time to prepare the base so that you can place the seat cover.
Install a Pad over the spings
Fix a pad over the spings with staple so that it stays in place. We place this pad so that the seat cover doesn’t go directly over the springs.
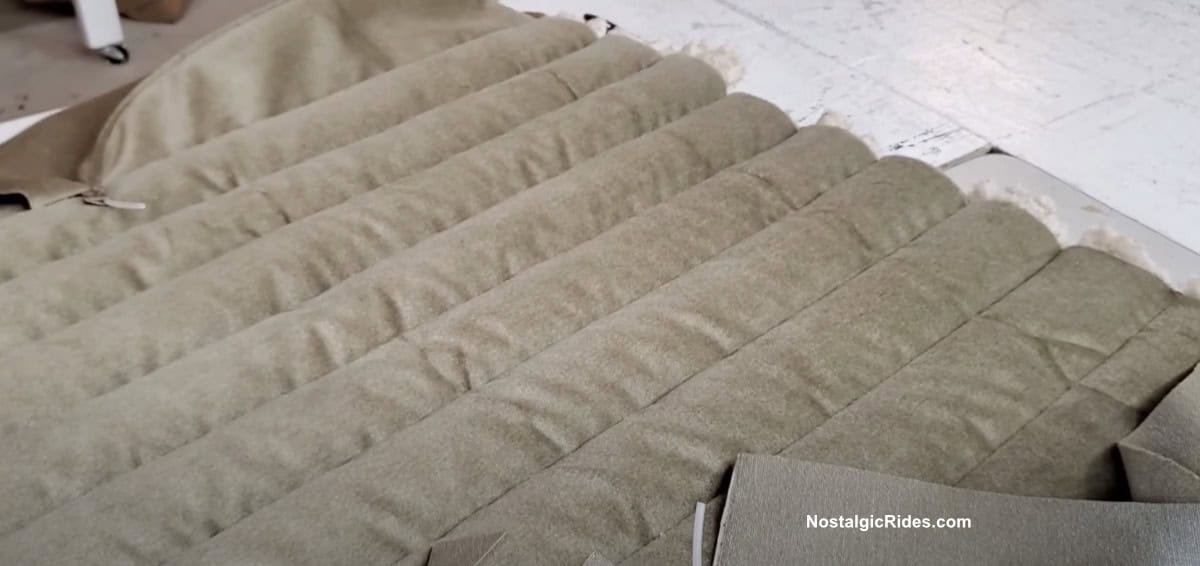
Install the seat cover
Stretch the seat cover and staple it to the bottom like in the picture.
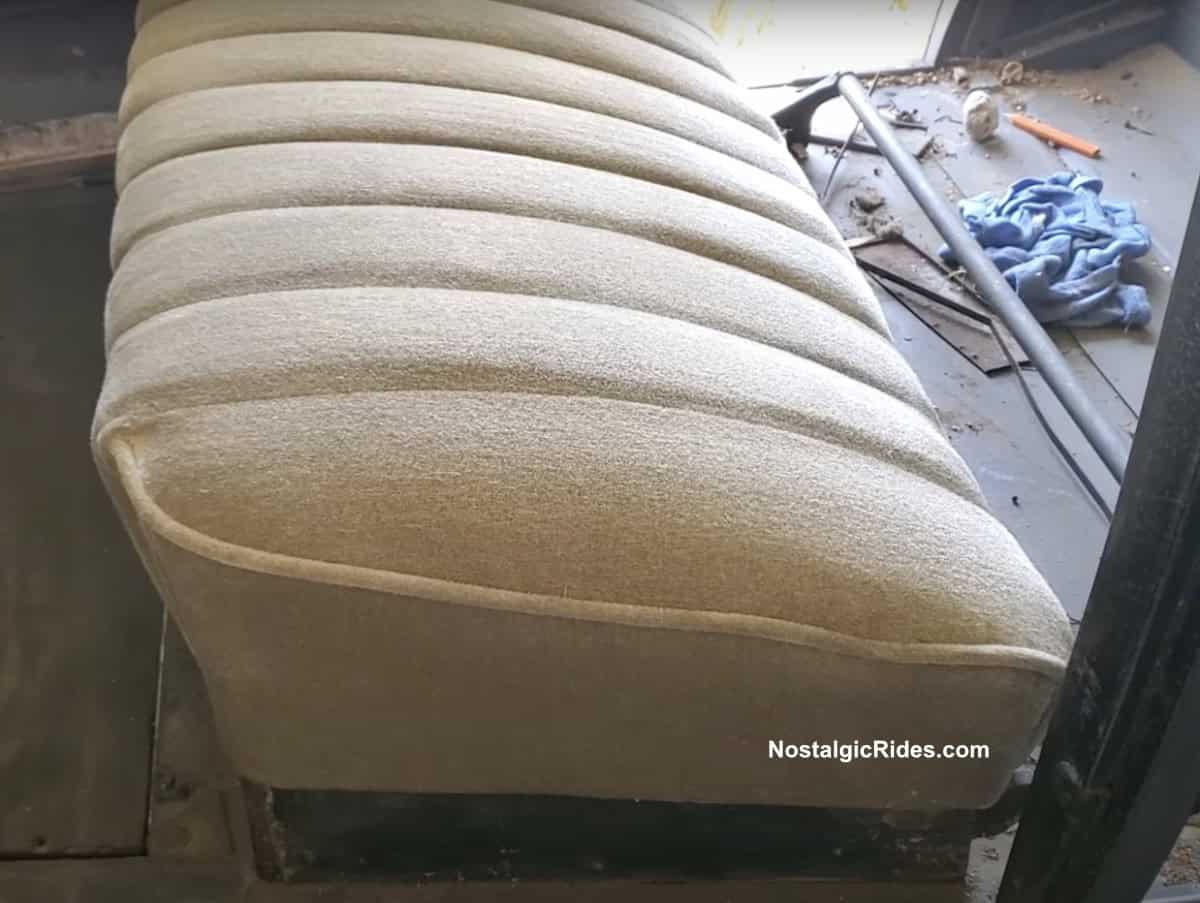
Cover Installed
Here we have the seat cover installed. As it is a modern velour if you stroke down it shines and stroke the other way it doesn’t shine. We will take and aditional step so that it won’t shine as much when stroked to one side so that it doesn’t look to modern.
Steam the fabric
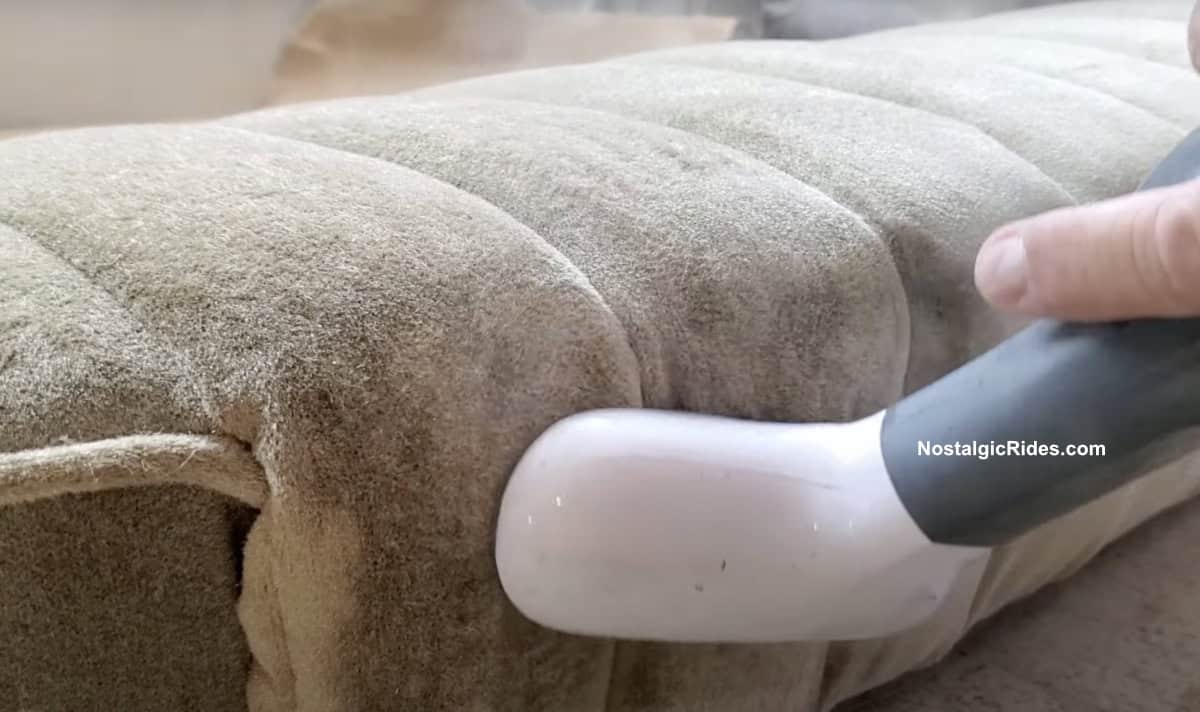
We use a steamer against the nap over all the fabric. In my case we had to do it down to up like in the pciture.
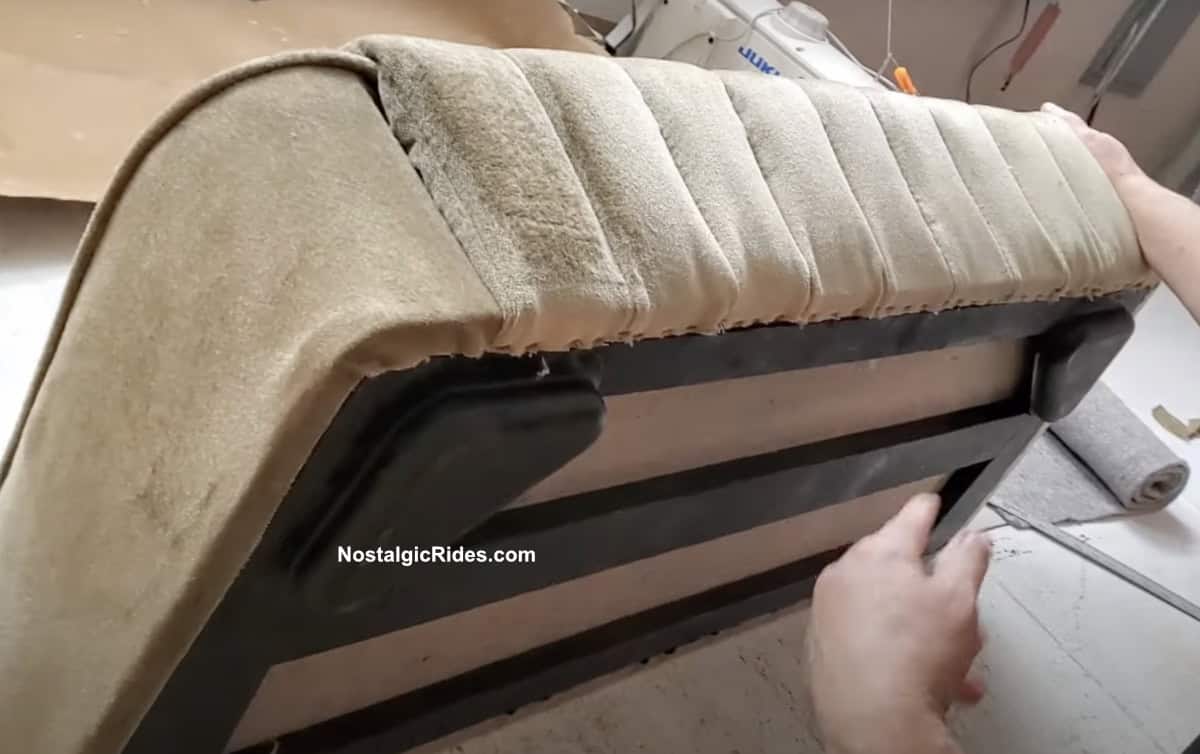
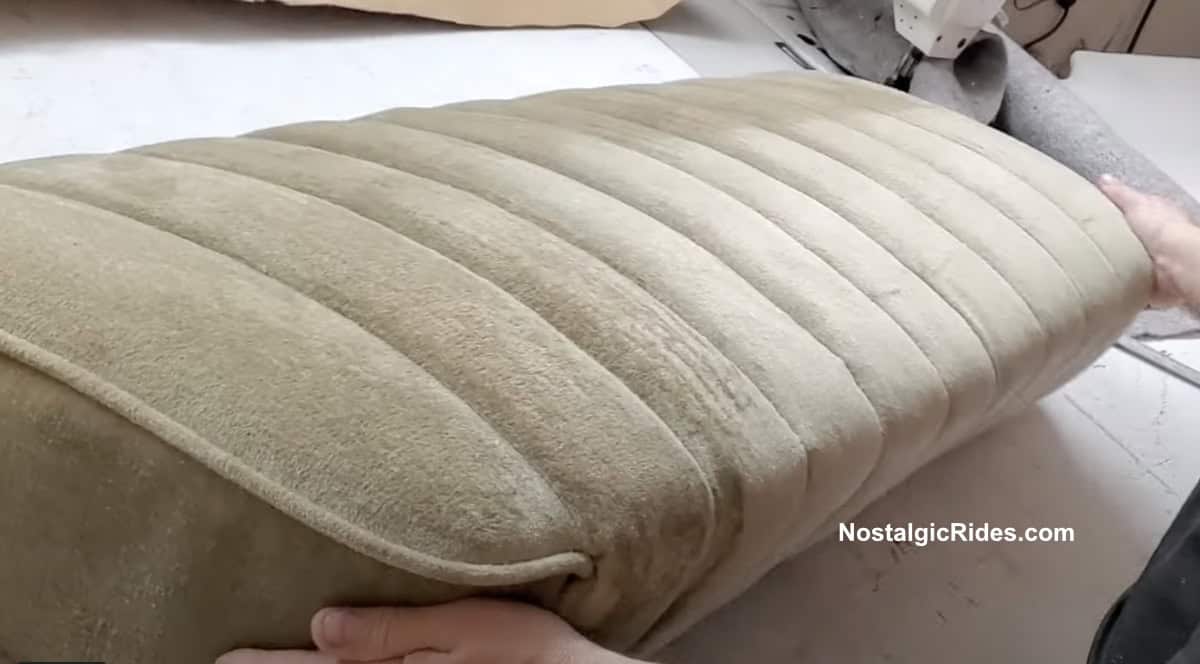
Finished front seat
In the picture you can see the finished front seat bottom. The process to do the back of the Front seat and the complete Rear seat is the same so you should follow the same steps.
Frequently Asked Questions
How often should I replace the upholstery in my antique car?
The frequency of replacing upholstery in an antique car depends on various factors such as usage, storage conditions, and the quality of the original upholstery. Generally, if the upholstery shows signs of wear, damage, or deterioration, it’s time to consider replacement.
What are the signs that indicate it’s time to replace the upholstery in my antique car?
-Tears, rips, or holes in the fabric or leather.
-Fading or discoloration that cannot be restored.
-Stains or odors that are difficult to remove.
-Sagging or loose upholstery padding.
-Visible wear and creases in high-traffic areas.
What types of materials are commonly used for antique car upholstery?
Common materials used for antique car upholstery include:
-Leather: Classic, durable, and luxurious.
-Vinyl: Affordable and easy to maintain, suitable for vintage looks.
-Fabric: Various types like wool, tweed, or velour, depending on the era and style of the car.
How can I ensure that the new upholstery matches the original design and style of my antique car?
To ensure that the new upholstery matches the original design and style of your antique car, it’s crucial to use accurate patterns, colors, and materials.
Are there any specific considerations or challenges when replacing upholstery in an antique car compared to a modern vehicle?
-Preserving historical accuracy and authenticity.
-Matching vintage materials that may be no longer in production.
-Custom fitting upholstery to unique vintage car interiors.
-Dealing with delicate or fragile original upholstery components.
What is the typical cost range for replacing upholstery in an antique car?
The typical cost range for replacing upholstery in an antique car varies widely based on factors such as the extent of the work, materials chosen, and the upholsterer’s rates. It can range from a few hundred to several thousand dollars, especially for high-end restoration projects.
How long does it take to complete the upholstery replacement process for an antique car?
The time taken to complete the upholstery replacement process for an antique car depends on the complexity of the job, the availability of materials, and the workload of the upholsterer. It can range from a few days to several weeks for intricate restoration work.
Conclusion
Changing the upholstery of an antique car is a meticulous yet rewarding process that requires attention to detail and a deep understanding of vintage craftsmanship. As an expert upholstery restorer, I’ve guided you through the step-by-step journey of transforming your beloved antique car’s interior into a timeless masterpiece.
Remember, preserving the authenticity and historical charm of your vintage vehicle is paramount. By following the techniques and tips outlined in this guide, you can ensure that the new upholstery seamlessly integrates with the original design and style, breathing new life into your classic automobile while maintaining its nostalgic allure.